This short was made under The Irish Film Board Short Shorts programme under their theme ‘Ireland I Love You’.
These blogs originally began on the blog of Brown Bag Films where James works as CG Supervisor.
JAMES STACEY (Director) -
With everything going on in Ireland at the moment it’s easy to get frustrated. For a lot of people things are looking quite bleak. This project was intended to show that there is still a lot of energy and vitality running through the country and with a change of perception we could tap into some of it.
I think that the stresses of an ancient Ireland may have been far greater than those of today, and that is something that we can lose sight of when faced with the challenges of everyday modern life.
The film has our hero bridge the gap between old and new and in doing so frees himself from the frustrated mindset we see him at the start of the film.
Below is the initial concept for the project, by concept artist Mark Molnar, which illustrates the two worlds combining:
(click on images to enlarge)

And the original 2D Character Concepts from Art Director Stephen O'Connor:


Once we had finished the 2D character concepts and were happy with the overall look and feeling, it was time to get those concepts into a structured form.
These images, from character designer Barry O’Donoghue, are the first development sketches and model sheet designs of the characters.


 Drawing up 2D model and gesture sheets is a great way to work out your
characters’ head & leg size, facial expressions etc before moving
ahead into 3D.
Drawing up 2D model and gesture sheets is a great way to work out your
characters’ head & leg size, facial expressions etc before moving
ahead into 3D.

3D CHARACTER MODELLING
It’s important to troubleshoot these issues early on so
the 3D artist doesn’t end up pushing and pulling in a 3D program which
is a lot more time consuming than Photoshop or using a pencil. Having said that there will always be a number of passes of tweaking and adjusting to get them to place we were happy with.
Greyscale sculpt of the main character

Early surfacing tests of the main character


Trying to get the girl's smile right

The Hunters Body out of Z-Brush sculpted by Sean Forsyth


Shown below are the 3D models that were finalised by Lead 3D Artist Donnchadh Murphy
A large part of the character’s action is sprinting through the streets of Dublin, so we wanted him to have a build and gait that could show this. It was important that we kept the strong angles shown in the concept and carry this through the other character designs as much as possible.


Once these models were finalised we moved into rigging and facial setup. These systems provide the animator with the controls to bring the characters to life.
BACKGROUNDS
With so much work going into the characters I wanted to play out the
film over an interesting backdrop and capture Dublin and to
try and distil it into visuals that shout out ‘Dublin’ at first glance.I felt that building Dublin city in numerous locations as a full 3D environment was not manageable in the style I was thinking of with the small budget.
The team had worked with using Background paintings to simulate 3D environments so we decided to go down that rouute. Souljacker, who are producing the film, have a strong live action background and by combining the two I felt we could be on to something.
So with camera in one hand and storyboard in the other, myself and the lads from Souljacker went out and shot the camera angles and compositions that had previously been worked out in storyboarding.
We shot some great stuff and got some great inspiration of the flavour of Dublin from the many shoots around the city.
Steven O’Connor (art director) had the task of working out how to bring these live action images into a style and painting design we were happy with. He took one of the photos and experimented with different styles. He painted out any unnecessary detail, extracted the key components of the photo and manipulated them.

The end result has a tactile quality but is also a reduced version of the reference image. We were really happy with the results.
Using a Maya >Nuke pipeline we projection mapped the background paintings on to 3D geometry allowing us to move or rotate the camera and teh 2D painting would come alive in 3D space.

CAMERA LANGUAGE AND COLOUR SCRIPT
A colour script is a simple storyboard of the colour palette of the film and how it changes from shot to shot. The colour script informed the background painting and decisions on what colour and tones should be used for each sequence. I feel it is important that the mood of the background is aligned to the man’s thought process.
This image shows the 6 paintings from the first sequence of the film. At this point our hero’s mind set is supposed to be closed, frustrated and uninspired:

As well as using colour to highlight the character’s dejected state of mind, In this sequence I also kept the camera angles locked favouring horizontal lines.
I shot it with a long lens so the perspective would be flattened. This helps make the staging seem static and restricted. In contrast, later in the film the camera choices are more dynamic and exciting as the hero becomes more energised. The lads did a great job in the painting I think.
Starting from the colour palette shown above, the colour develops into fresh and inviting colours.
LIGHTING AND COMPOSITING
In terms of lighting of the
backgrounds, for majority of shots there was not much work required, since most of them had lighting painted in already. Some extra work however was done for the
forest shots. An extra lighting pass was rendered for the trees, which served
as a mask for colour correction in Nuke to enhance the roundness and lighting
on the trees.

Aerial diffusion and god
rays were added in post production stage, as well as some Lightwrap effect for
better integration of character with the background.
This is the god rays pass on its own:

This is the god rays pass on its own:

Characters were lit with a key light with a
noisy texture simulating the 'dappled light' effect:

Some fill and rim lights
were added for characters to make the form and silhouettes read better as well
as to integrate with the environment.
Character pass was rendered
with motion Vector information for the motion blur effect (using Vector Blur in
Nuke).
Below is the breakdown of the compositing stages for the first of the forest shots:
This one is similar, but more detailed, showing all the raw render passes used in the compositing process:
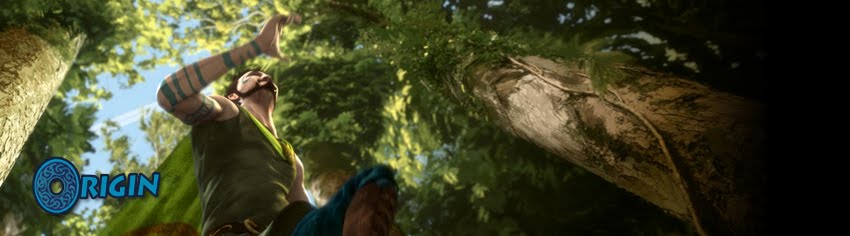
And this is the full, completed shot from the film: HERE
No comments:
Post a Comment